


SUPPLIES FOR WOOD STAIN:
1.Filtered coffee powder
2.Water
3.Glue

METHOD:
1.Take about two spoons of coffee powder in a container, the amount of coffee powder depends upon how much wood stain you want to make.

2.Pour water and stir well. This mixture of water and coffee powder should not be thick not should it be too watery but of medium consistency. For two spoons of coffee powder I added about 3 to 4 spoons of water. Adjust the quantity accordingly. Add water slowly so that you will get an idea of when to stop.

3.Mix the mixture well so that all the coffee powder is dissolved well into the water and the mixture turns dark.

Let the mixture set there for about 30 to 35 minutes so that all the coffee is absorbed in. While we have left this mixture to set it may happen that the water will get absorbed by the coffee powder but don't worry add some more water to maintain it's consistency.

METHOD TO APPLY WOOD STAIN:
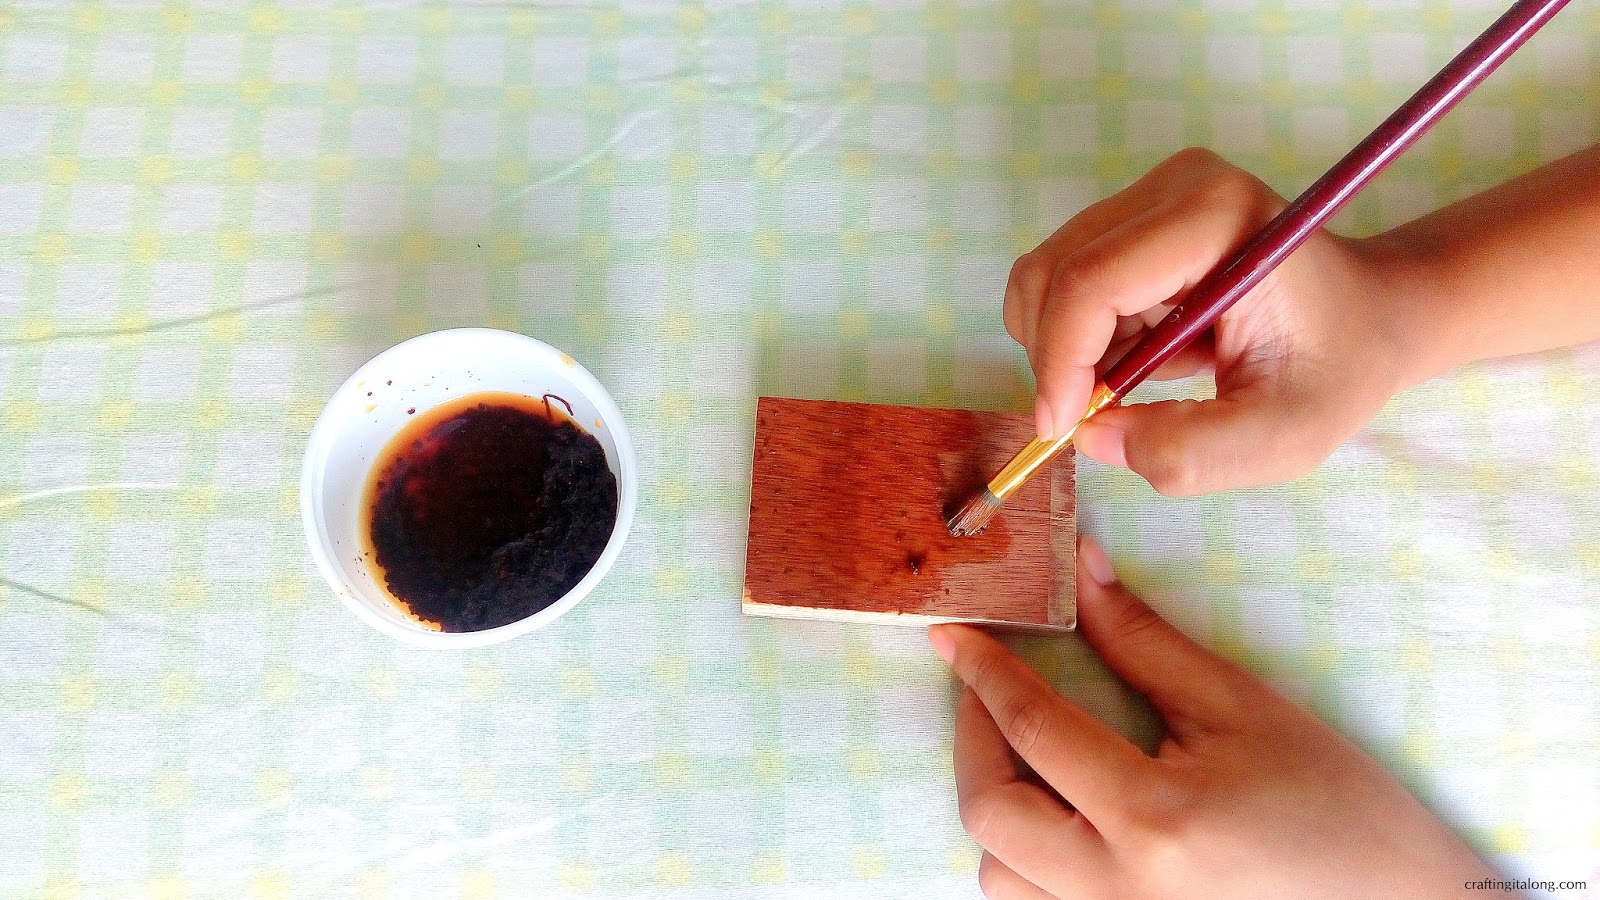
1.First clean the wooden piece with a dry cloth. Take a brush and gently apply the stain to the wood. While applying the stain the coffee powder may also come with the brush to the wood leaving a grainy texture along with colour, don't worry let the stain dry then take a dry cloth and wipe the wood surface gently and the coffee powder will come off easily.

2.Apply more than one coat of the stain to the wood. I applied about 3 to 4 times. This depends on you, how much dark you want the stain to be. With applying every coat leave it to dry and wipe the coffee powder and then move to the next coat.
I did not painted the stain to the sides of the block as in the next step we will decorate it.

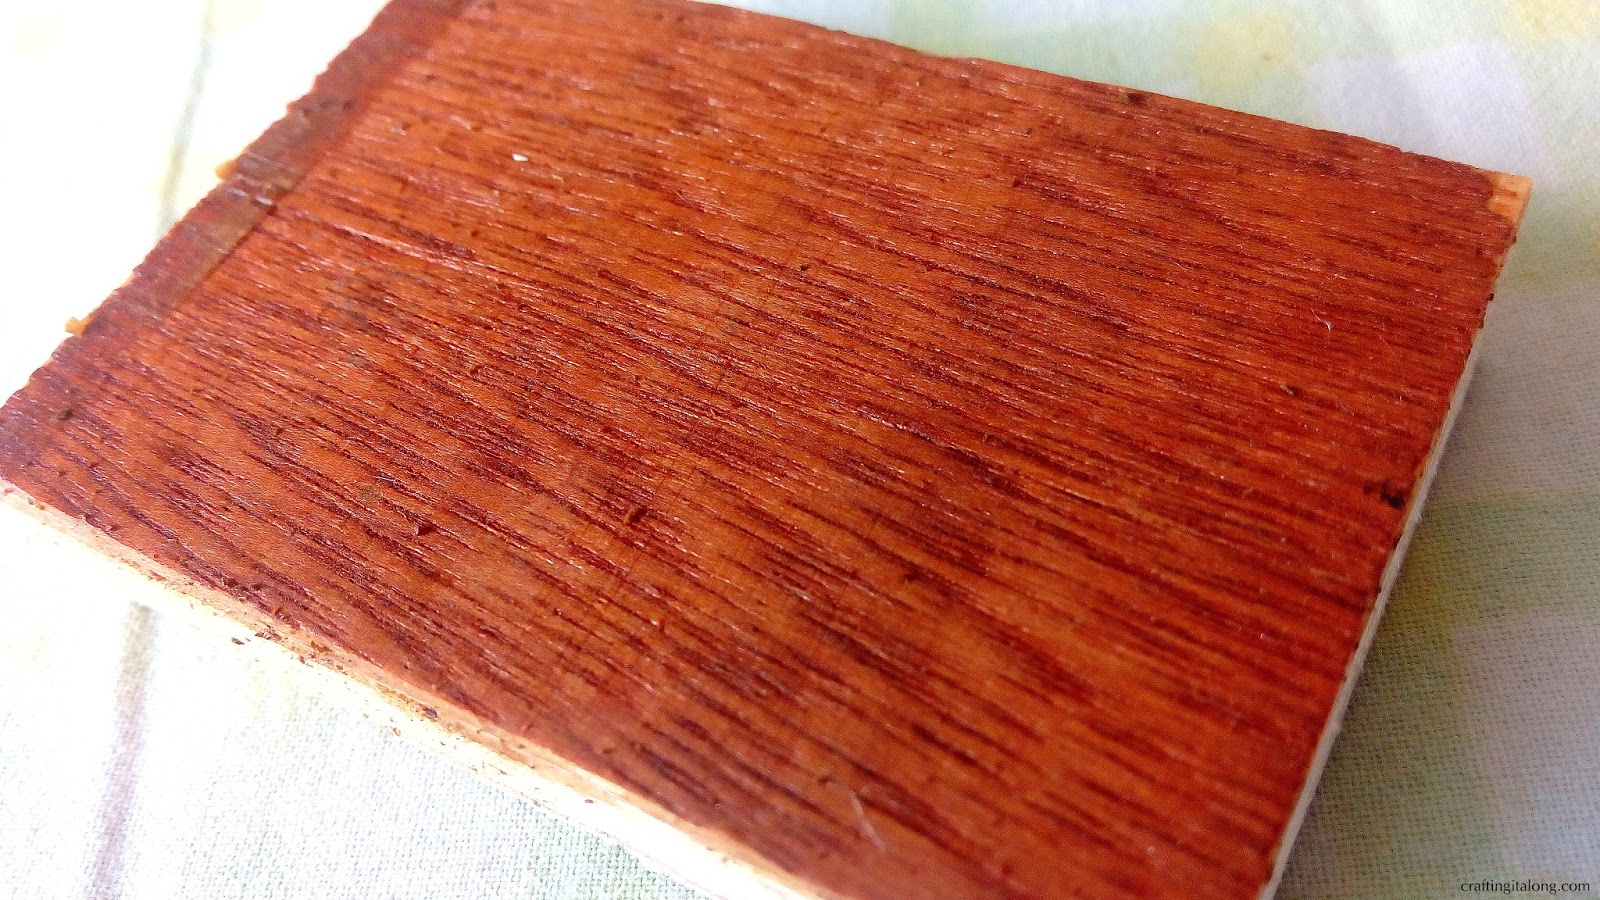
3.Apply glue to the area where you have applied the wood stain to set the stain and give it a glossy finish. I used a popsicle stick to spread the glue to the surface even a brush will do the same job. The layer of glue must be even along the surface.

WOODEN PIECES DECOR:
SUPPLIES:
1.Wooden piece with the DIY wood stain applied to it as done in the previous steps.
2.Coloured tape
3.Permanent marker
METHOD:
1.Cover the sides of wooden piece with the coloured tape of your choice. Since my tape was thin it could not cover the entire side at once so I applied two layers of tape to fully cover the sides.


2.Take the permanent marker and write your favourite or any motivation quotes on it.

And there you have your wooden pieces ready to decorate. In the post about DIY Display Shelve+decor tips I talked about how you can play with the levels of the things to be displayed on a shelve, this Wooden Decor Pieces work so well, you could keep something on top as this fake plant and also something besides it to show variations in the shelve. It not only helps to play with the levels of the things but it itself is a decor item and can also be kept as it is. Use these the way you want the how you want and decorate your space.


0 comments:
Post a Comment